


I'm a Unix/Linux old geezer so, as I had access to Blender, I used it as my design tool. I'm not sure that I should not have chosen OpenSCAD as I've had experience with POVRAY and from examples I've looked at, there seems a strong relationship between them. And I like the idea of ASCII text files I can twiddle. Blender is definitely more a tool for artists and to do engineering type design utilizing it requires a lot of re-thinking as well as learning how to constrain things to specific geometries.
After a bit of research it was obvious (to me) that sintering had it hands down over filament printing and that I could have a lot of sintered items printed for the cost of even the lowest priced filament machine. The primary reason sintering is so much better is that you can virtually ignore "e;overhang"e;; I can hardly imagine a useful item I would design that didn't have some overhang and designing supports etc and the cleanup after printing is something I wanted to avoid. I happened to choose Shapeways as the company to do my printing and have nothing but good to say about them.
I started by trying to make simple objects in Blender. It was interesting to say the least. Almost everything I tried to do using my background in engineering drawing was a failure. Using tutorials I sought on the web plus lots of practice and learning from my failures I slowly began to make progress.
An early design piece was a simple right angled part with a slot.
|
|
|
|
| Blender Mesh view | Blender Solid view | Finished Object |
Another of the early items was a simple bracket; something I could have drawn in five minutes with a triangle, T-square and compass. I don't want to tell how many hours I spent until I managed using Blender!

|

|
Blender Rendering | Blender Solid view |
Then I wanted to make a part that fitted the slotted hole in the bracket. Something like this.

|

|
Blender Rendering | Blender Solid view |
Here's where sintered parts really shine.
Look at the fit between these two parts. (I've chamfered the end
with flats in preparation for threading so it looks a bit rough.)

|
| A great fit |
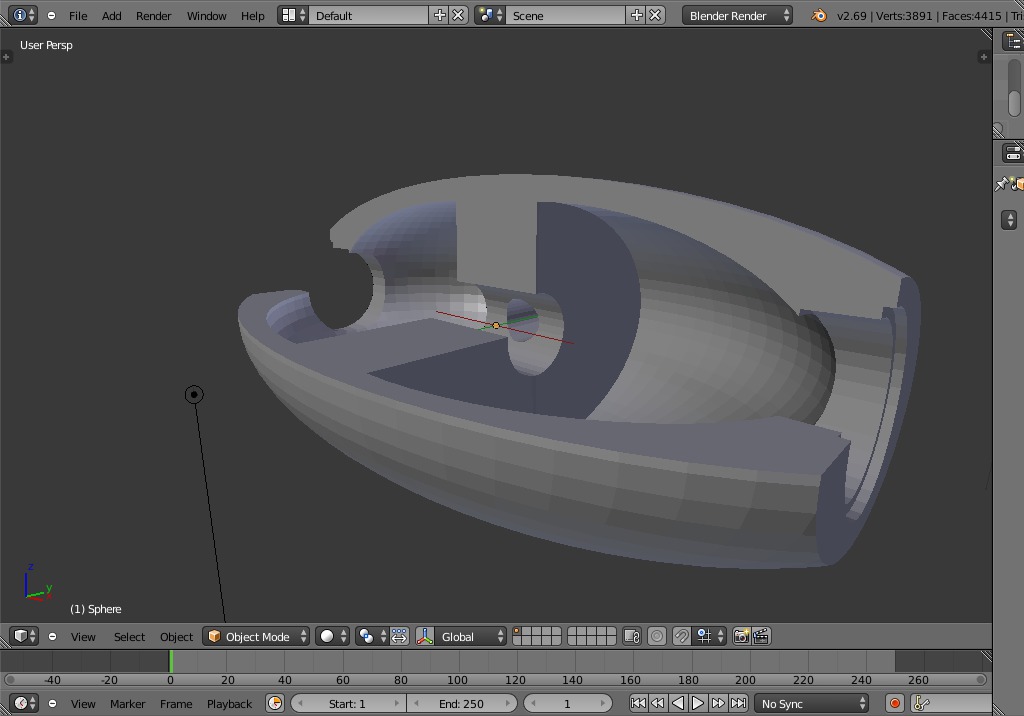
Then I tackled something far more ambitious; something hollow and with lots of holes:

|

|
|

|
| Blender Mesh view | Blender Solid view | Blender Cutaway view | The finished object |

|

|
| Bearings Fitted And, Believe | it or not, the shaft |

|
Over the summer I updated to another Linux system (old one was crufty) and I could run OpenSCAD. A winner here, in a short time I was able to re-do the arbor. Outer shell here shown ghosted.
Taking some time off for fishing. More to come this fall.
Some time later and I decided to expand my abilities by combining inkscape, openscad and blender. So I put on my beret and tried some "arty" stuff. First I did a mayfly stripping guide:
 |
 |
 |
| The design | Grrr, ring too big | A hatch! |
Then onto more buggy stuff an ant and a damselfly:
 |
 |
 |
| The damselfly design | An ant | Meet your new neighbor |
 |
 |
 |
 |
| A slightly (by design) helical gear. | Good design | goes together, like peanut butter and jelly. | |
And pimp my vise:
 |
 |
|
| Material clip (sans spring) | Keep track of the allen key |